


PTSolns ESP Master Key Kit
PTSolns ESP Master Key Kit
Couldn't load pickup availability
NOTE: For large quantity orders with custom pricing please contact us directly.
This product has a datasheet!
Also available on
Overview
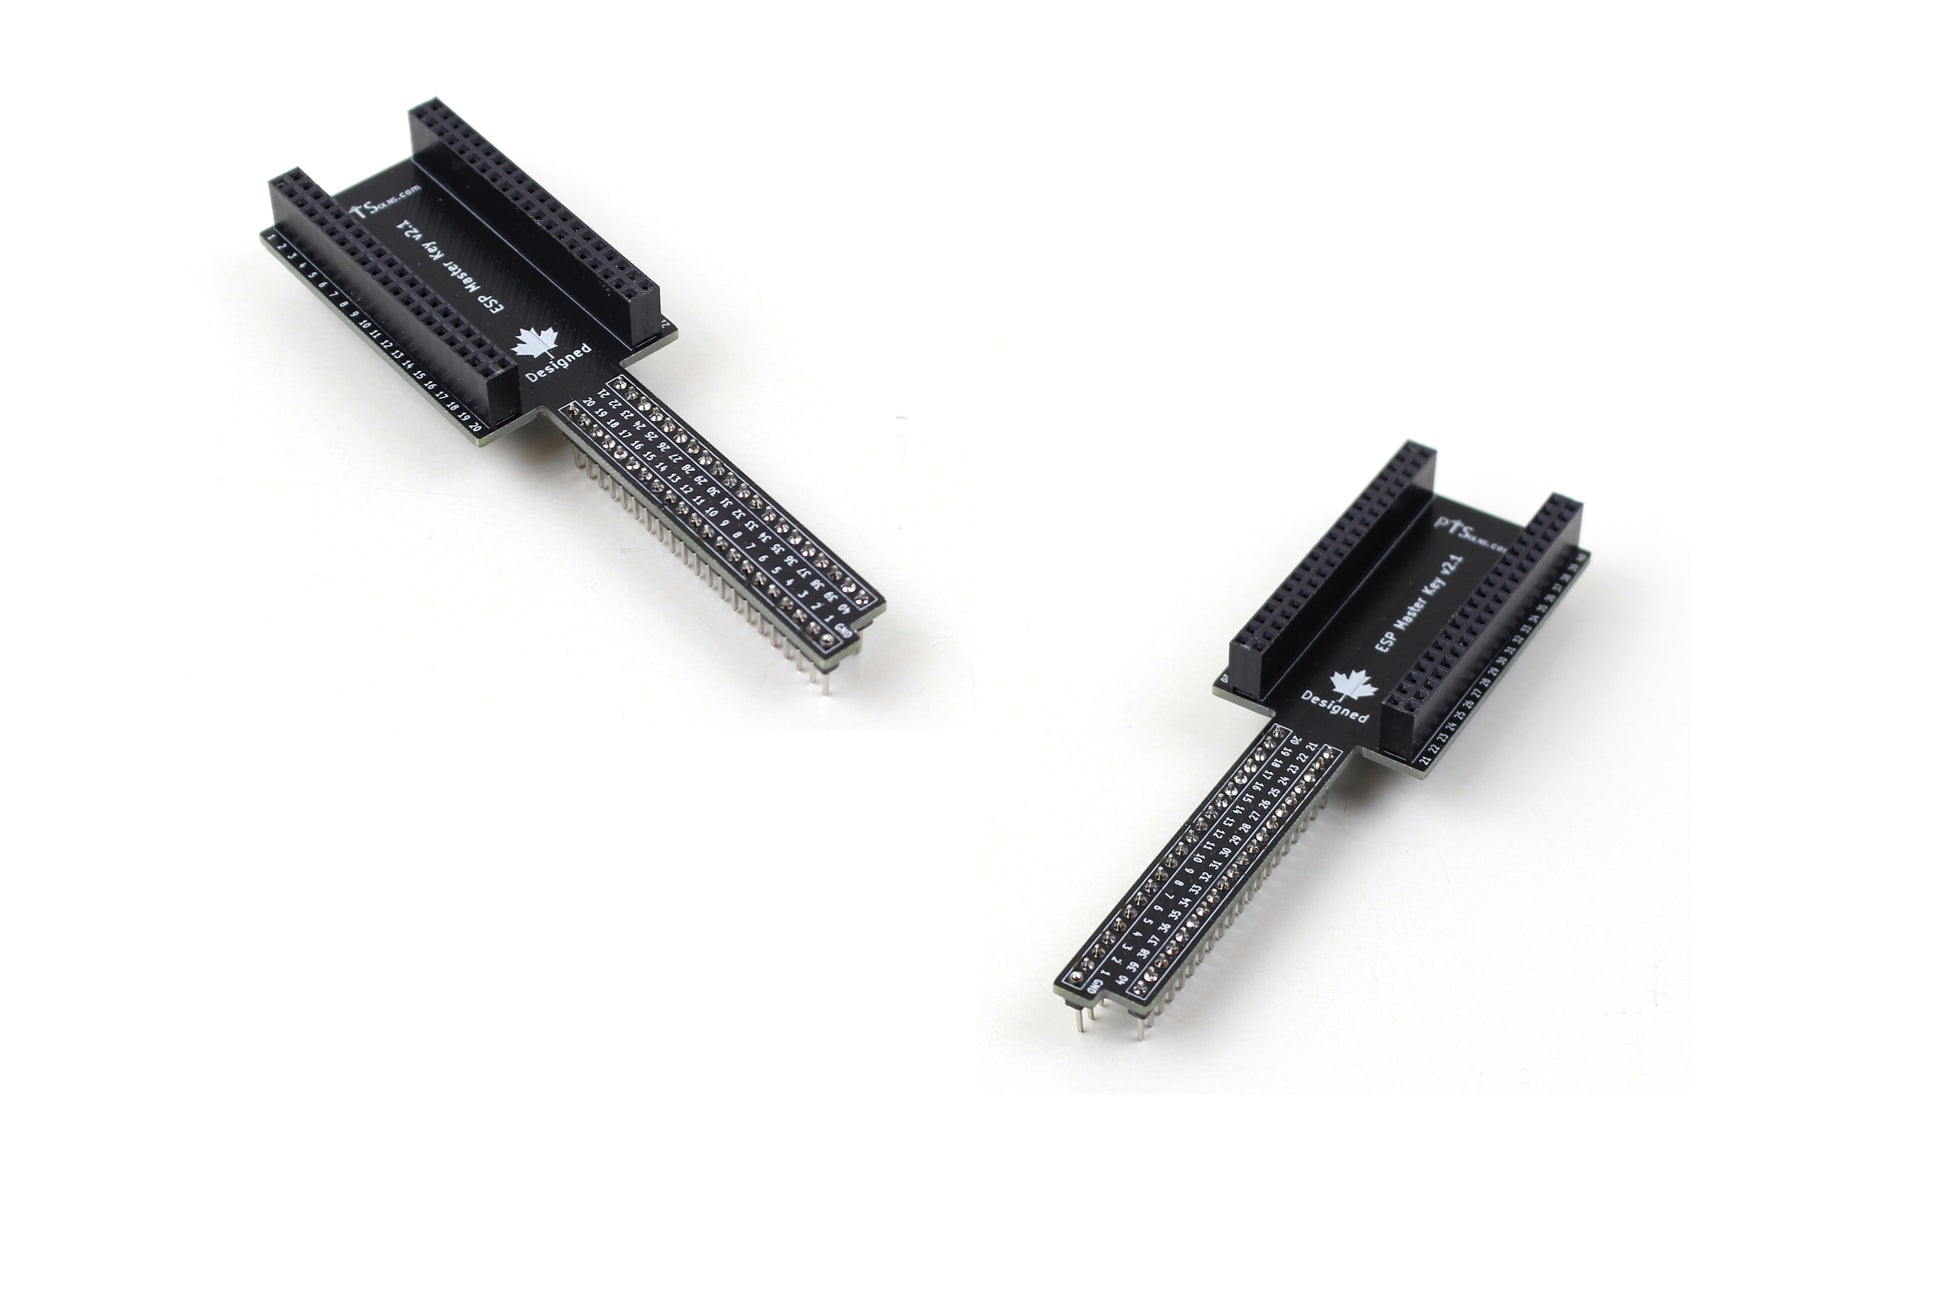
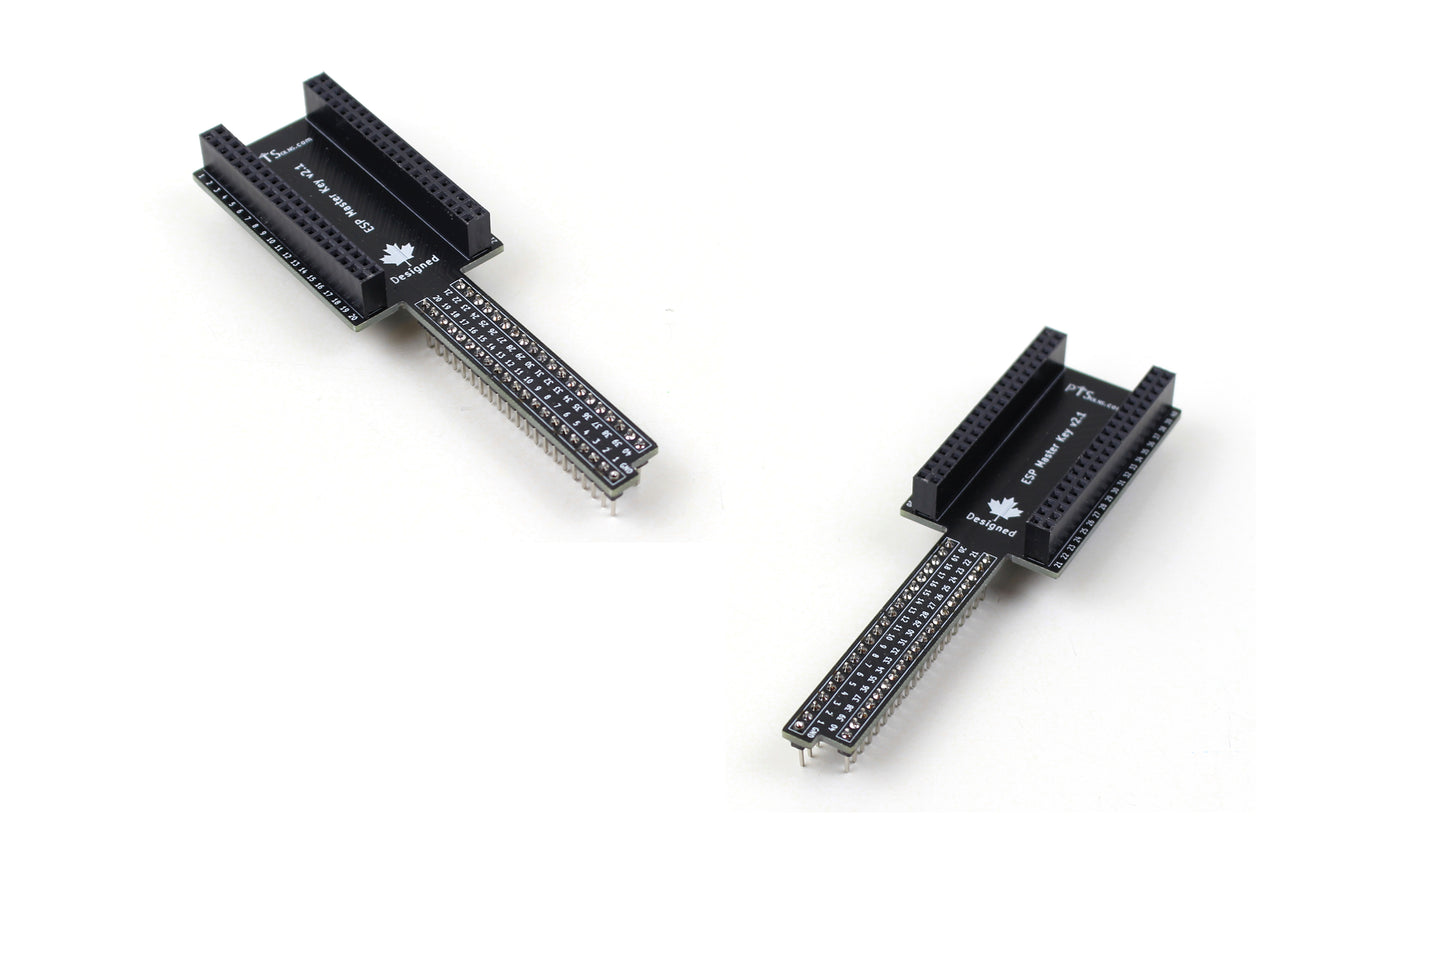
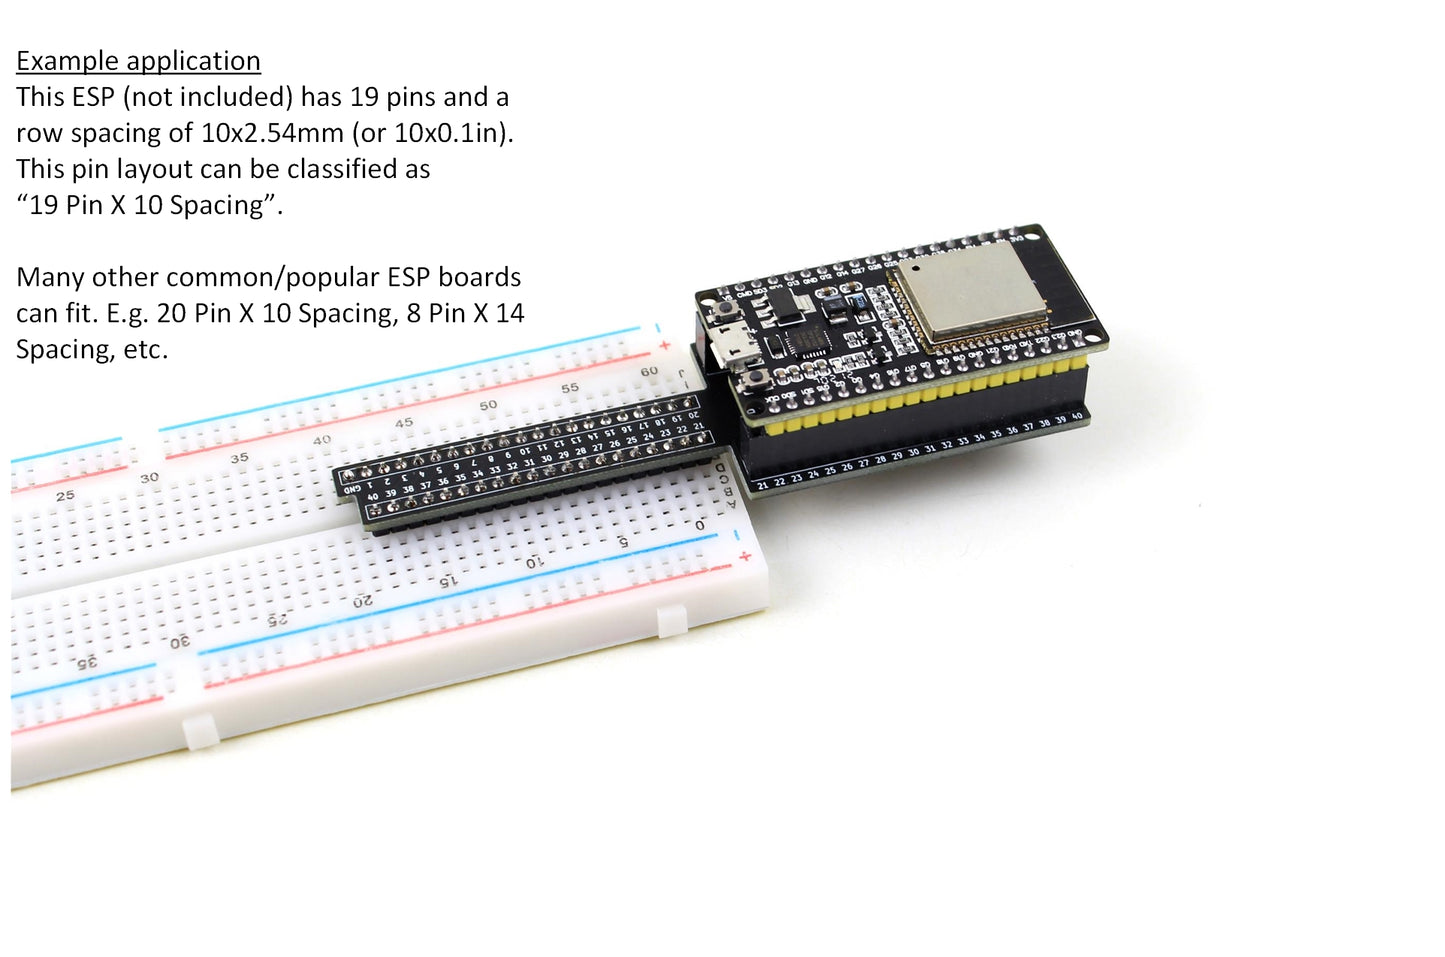
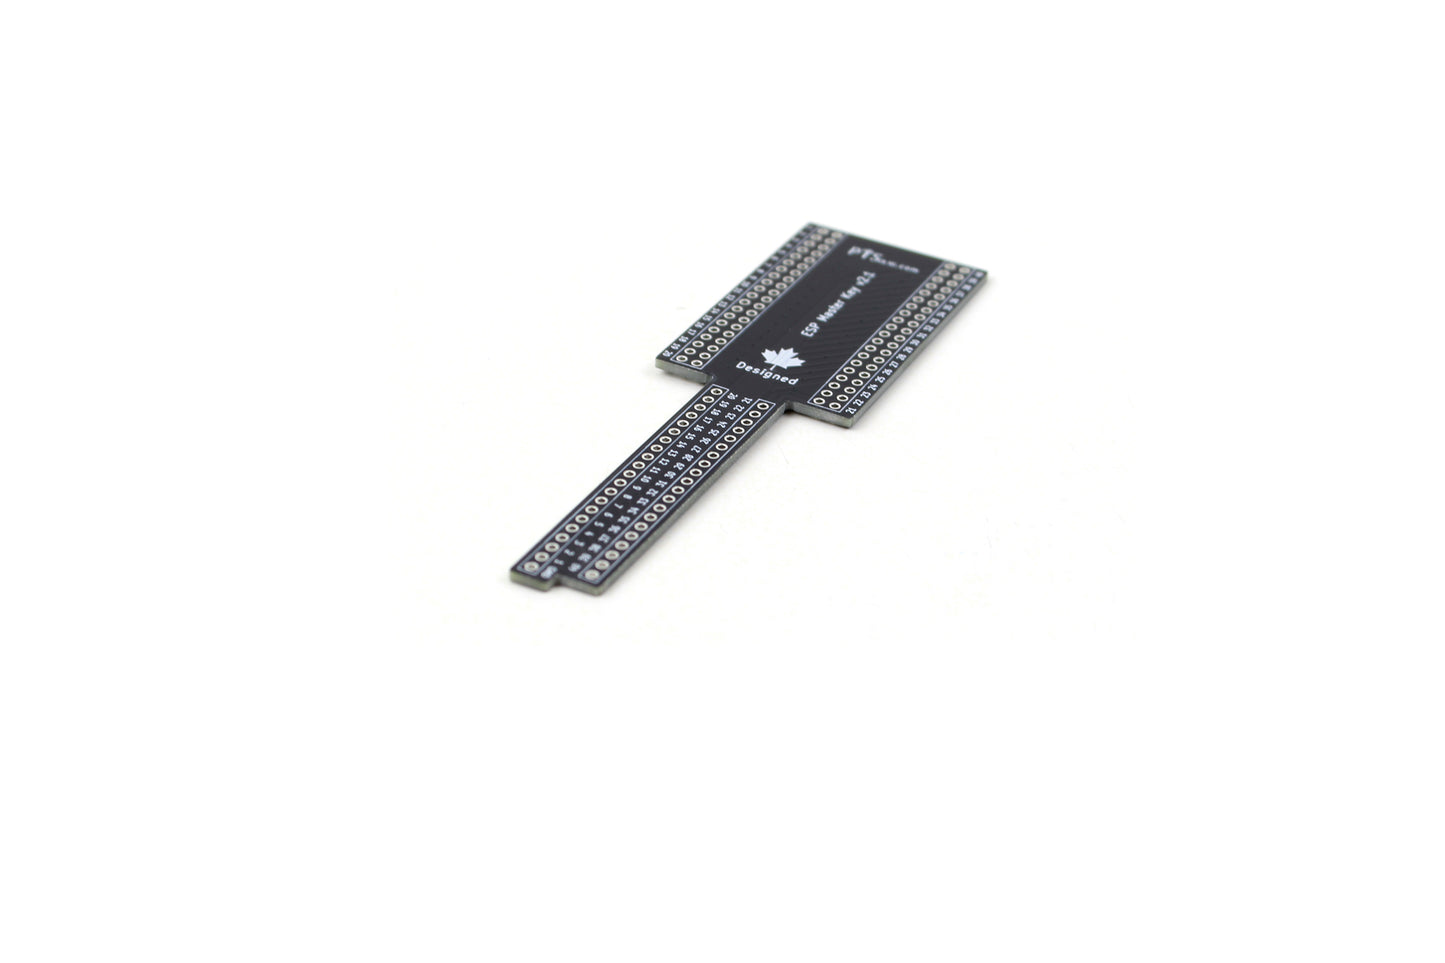
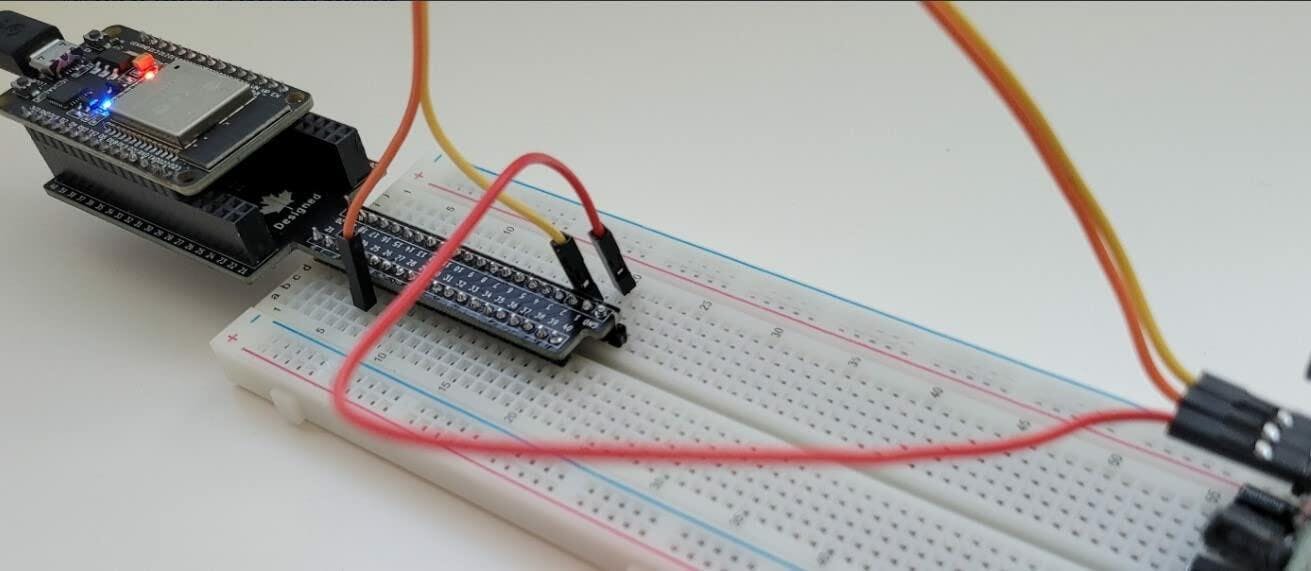
The PTSolns ESP Master Key is part of the Key-Series. This Key makes working with many of the ESP boards simpler and more efficient, in turn saving you time and frustration. The ESP Master Key is an ESP breakout board adapter that connects popular boards, such as many of the ESP boards, to a breadboard or prototyping board. The unique design frees up precious space on your breadboard/prototyping board and eliminates complicated wiring schemes that take hours to install and easily rip off when trying to remove the ESP board from the breadboard. If you have ever worked with an ESP on a breadboard, then you know the struggle!
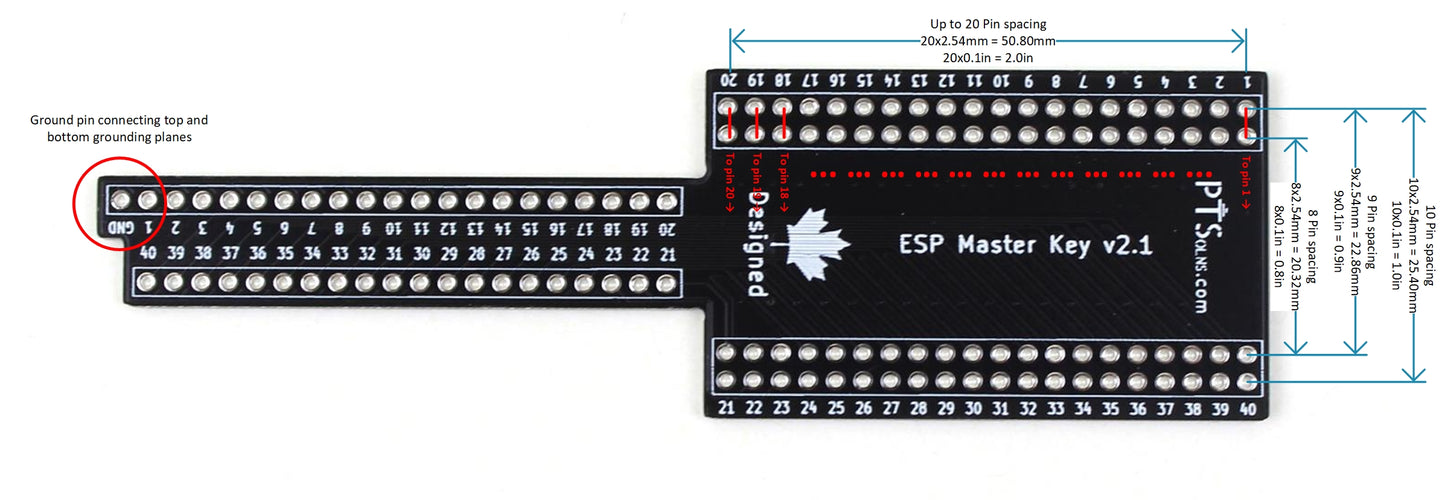
This ESP Master Key is called "Master" as any of the standard ESP boards will interface with it. The Key can interface with a board of up to 20 pins per row (2.54mm/0.1in pitch) and a row spacing of 8x, 9x or 10x 2.54mm/0.1in (See Schematic in images). The Key fits on any standard breadboard/prototyping board, and also the PTSolns Proto-Full and Proto-Half boards.
Some of the key features include:
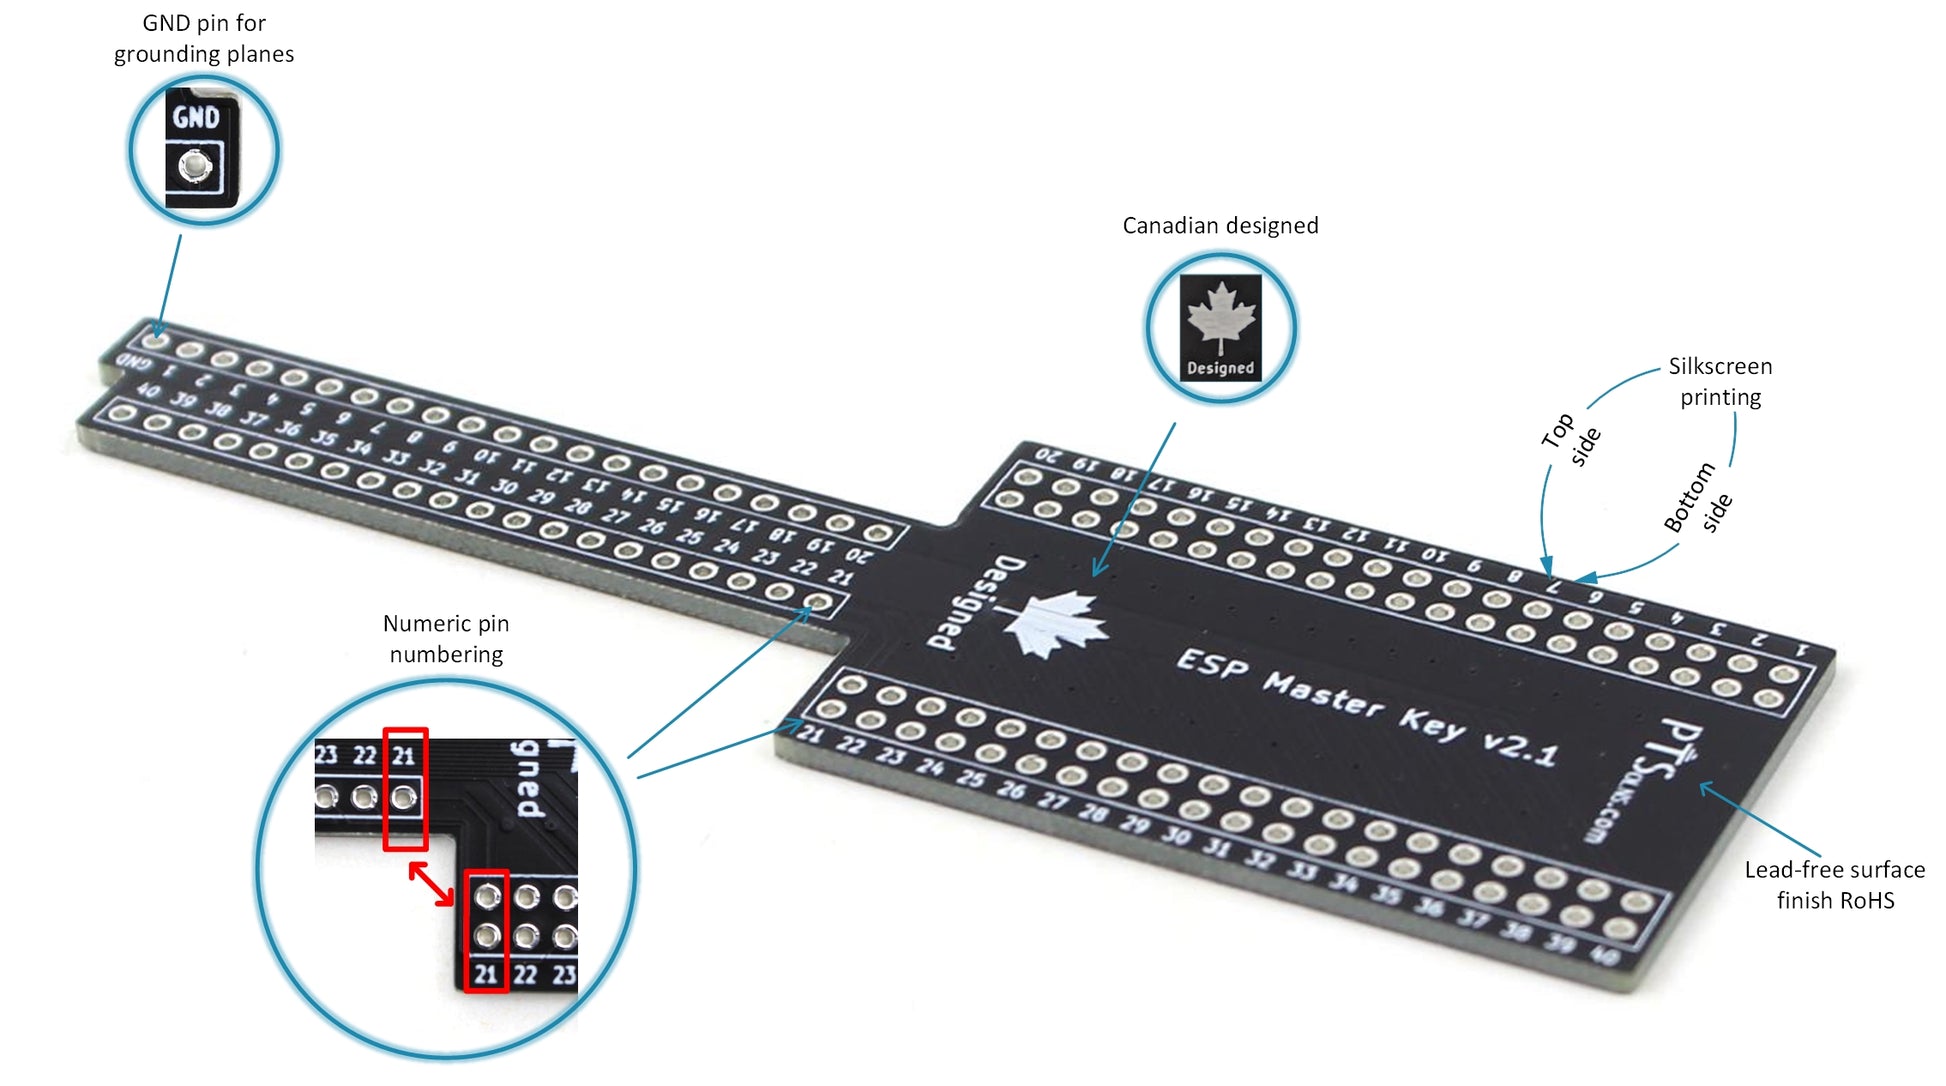
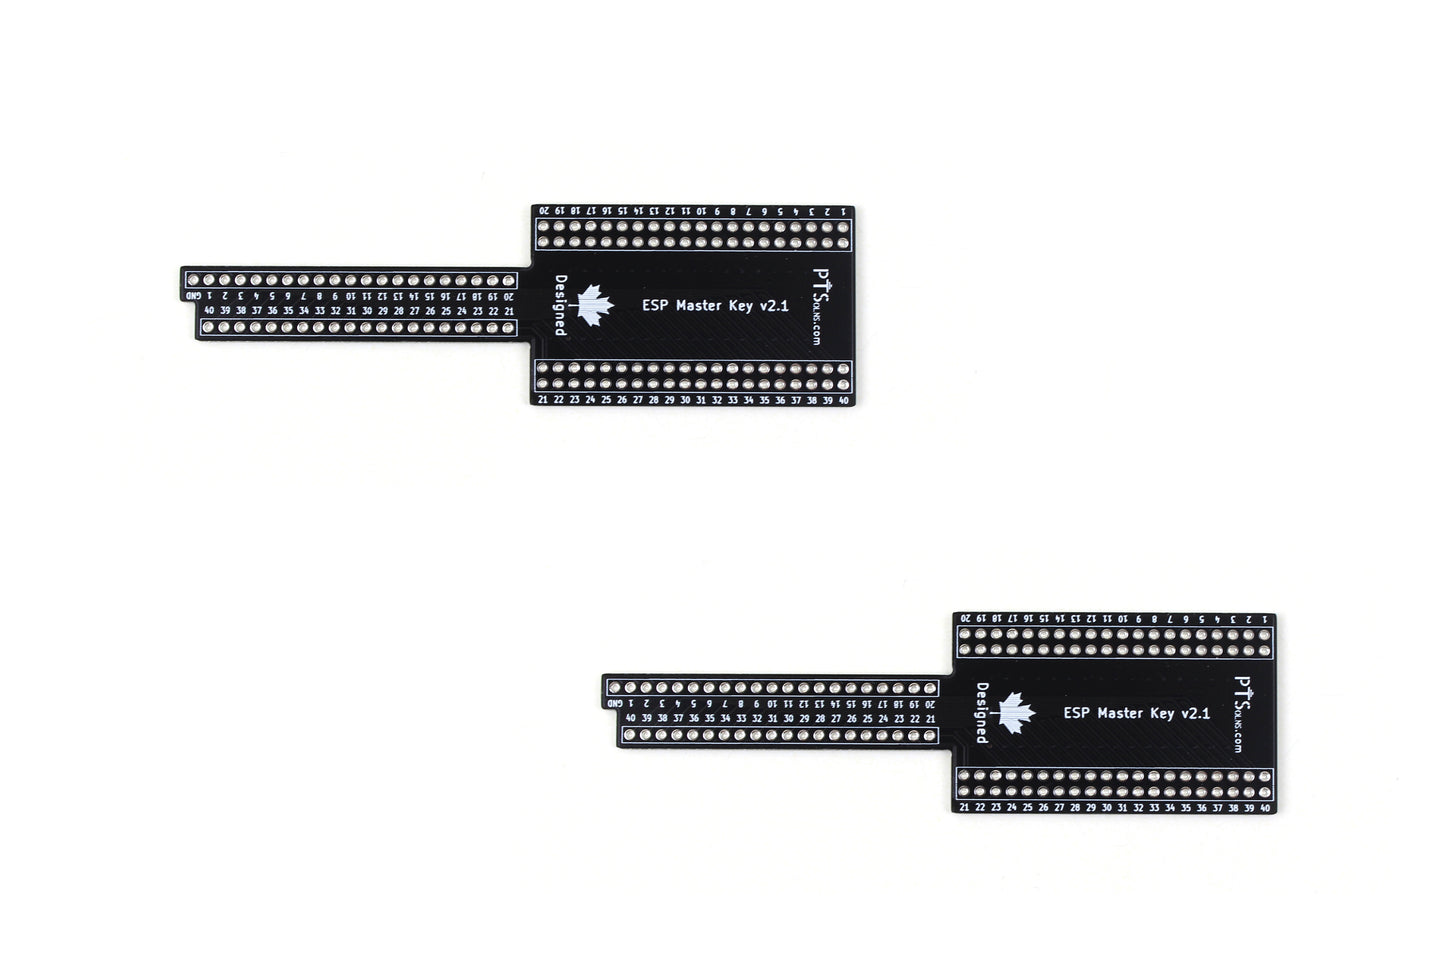
- Silkscreen printing on both sides.
- Easy numeric pin numbering from 1 to 40.
- Top and bottom ground planes connected to ground GND out pin.
- Fits many of the common/popular ESP boards.
- Lead-free surface finish RoHS.
- Compatible with standard breadboards/prototyping boards and also the PTSolns Proto-Series!
Frequently Asked Questions
Q: Why is the board not soldered and assembled?
A: The simple answer - to keep the cost down and pass on the savings to the user! Since this Key has soldering on both sides of the board, PCB manufacturers have very high fees to assemble this board.
Q: Is there a procedure to assemble the Key?
A: Assembling this Key is fairly straightforward. However, here are some tips.
- Start with the Male Headers in the product package. Break one of the Male Headers so that there are 21 pins remaining, and the other so that there are 20 pins remaining. Put the Male Headers through the PCB so that the solder joint is facing up. Then push these two rows of headers into a standard breadboard. This will make sure the headers are straight and aligned. Solder all 21+20 joints.
- Insert the Female Headers so that the solder joints are facing down. You may need to remove the PCB from the breadboard as per point 1. To ensure a straight soldering job, we recommend to take the ESP board you want to interface and put it into the Female Headers so that they are secure and aligned. Solder these 80 joints.
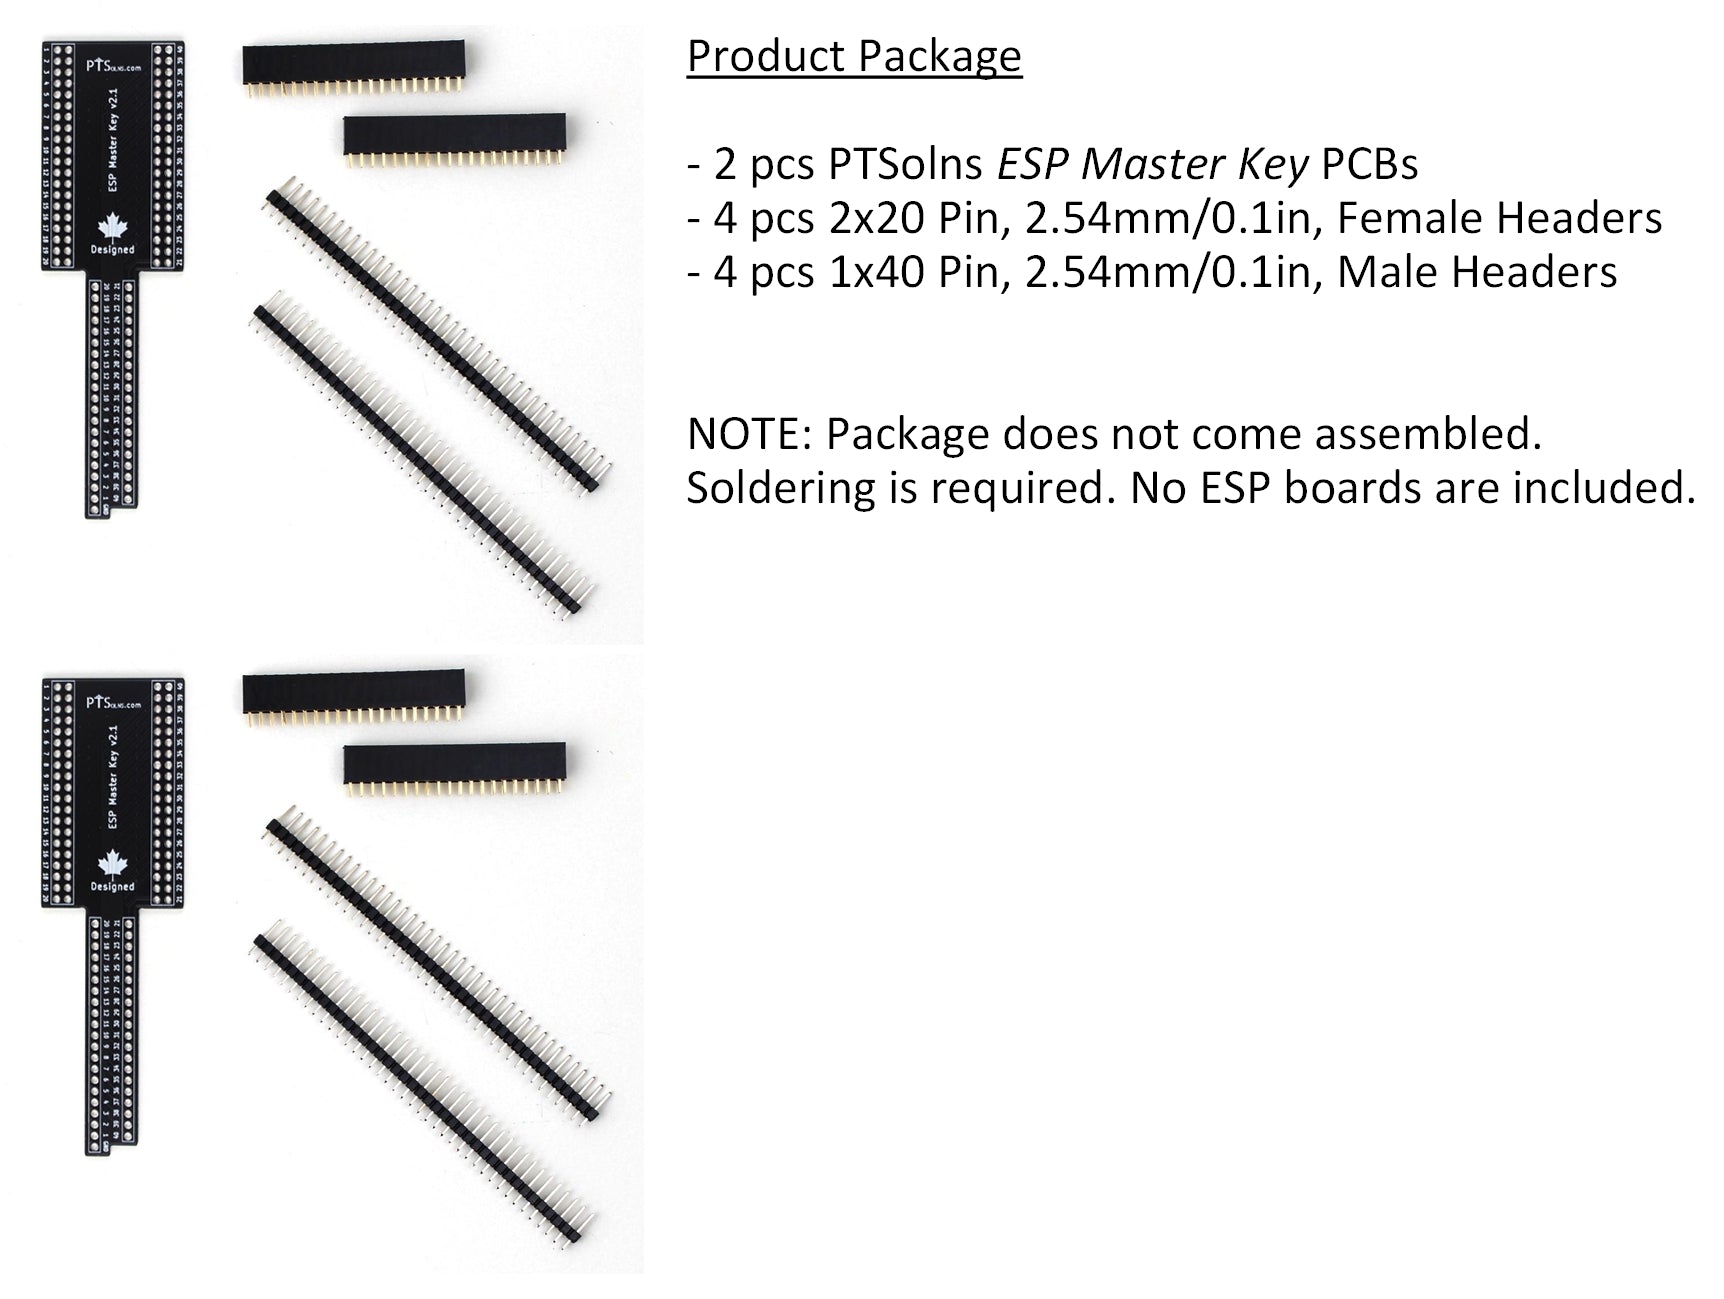
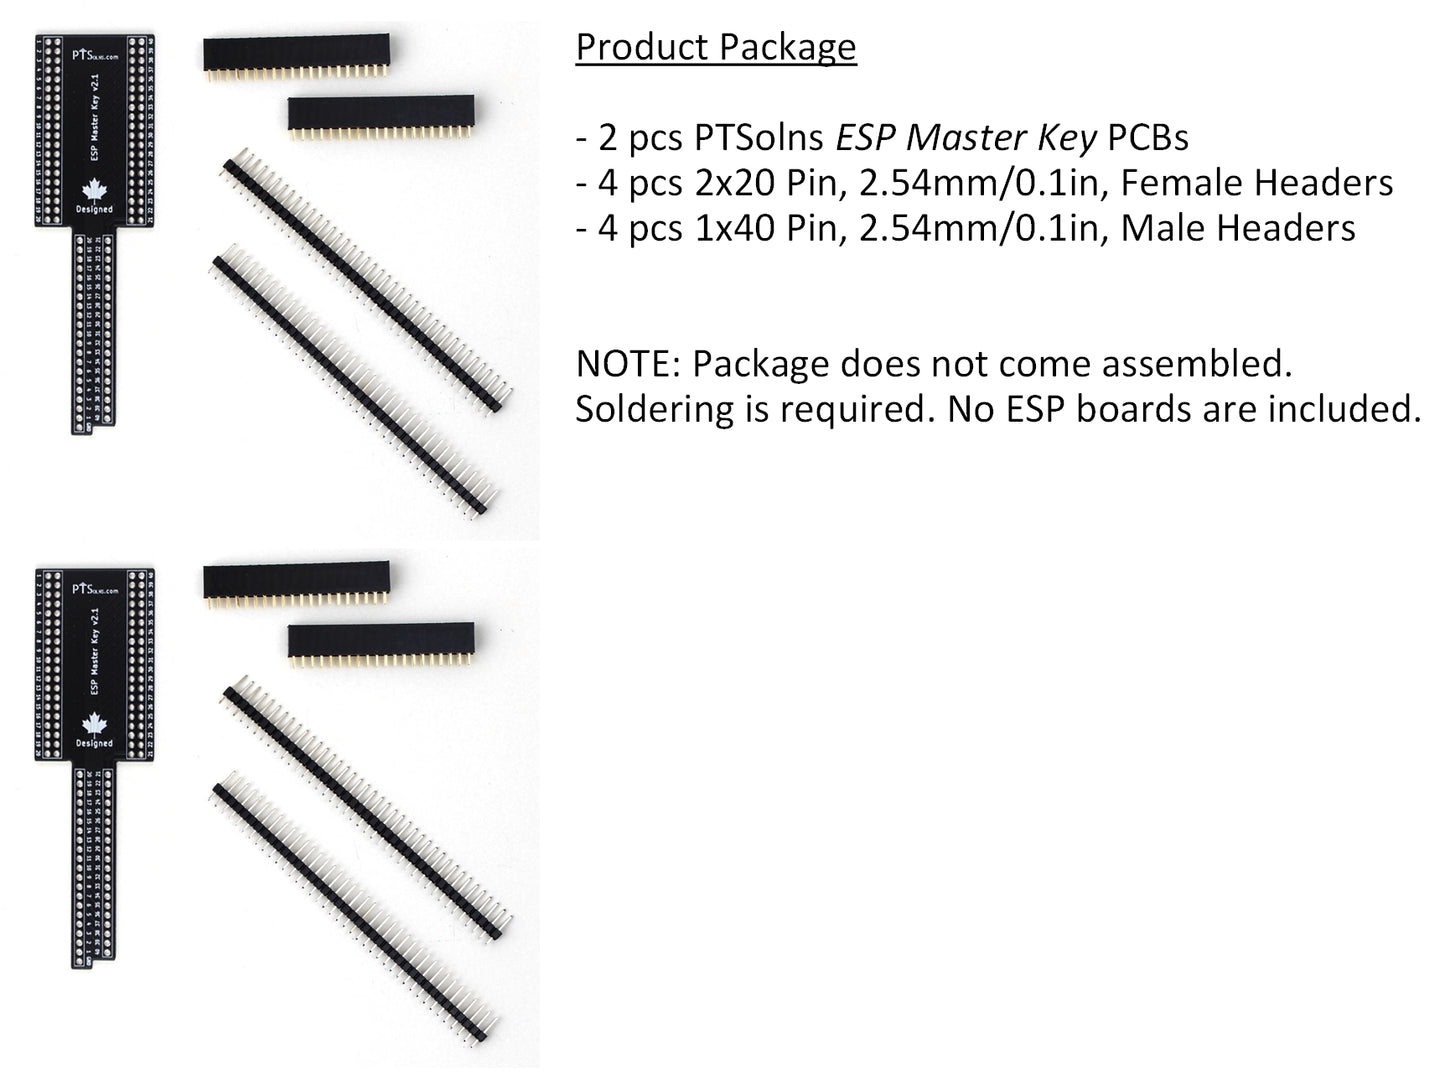
Product Package
- 2 pcs PTSolns ESP Master Key PCBs
- 4 pcs 2x20 Pin, 2.54mm/0.1in, Female Headers
- 4 pcs 1x40 Pin, 2.54mm/0.1in, Male Headers
Other Resources
- Check our YouTube channel for videos that cover this topic.
NOTE 1: The ESP Master Key does not come assembled. Soldering is required.
NOTE 2: Parts in this package could be a choking hazard for young children. Please exercise caution.

Customer Reviews
So many of us bought ESP32 modules with the four holes in the corners and less pins because they are generally less expensive and more available. And until now, it was either directly connect to module header pins OR suffer the bent-pin-plus-holes-hog-on-breadboard problem.
This kit solves it ALL - for two of your modules. Yes, unfortunately it does require some soldering to put together. But well worth the effort! And now with those excess face masks lying around - you can redeploy them to spare yourself of lead fumes.
IMO these breadboard helpers are a must have. Makes breadboard wiring so much easier. I do recommend NOT using the supplied headers to plug into the holes in the breadboard. Use machine pin headers instead as they are much easier on the springs in the breadboard holes.